

You use moisture mapping and thermal imaging to locate hidden water intrusion, heat loss, and building defects before they spread. Moisture meters and mapped readings show where dampness is active, trapped, or drying out, while infrared scans expose cold spots from leaks, missing insulation, air leakage, and thermal bridging. When you compare these anomalies with surrounding materials and conditions, you can trace the source, prioritize repairs, and confirm the right fix with more detail below.
Key Takeaways
- Moisture mapping locates water entry points, tracks spread, and distinguishes active leaks from residual dampness.
- Thermal imaging reveals temperature differences that indicate heat loss, air leakage, missing insulation, and thermal bridging.
- Together, they expose hidden problems behind walls, roofs, windows, and plumbing before visible damage appears.
- Patterns in moisture and temperature help trace the source path, confirm anomalies, and guide targeted repairs.
- Regular inspections and calibrated diagnostics improve detection, reduce mold risk, and prevent costly structural damage.
What Moisture Mapping Reveals

Moisture mapping reveals where water has entered a structure, how far it has spread, and which materials are retaining it. You can trace moisture sources by applying mapping techniques that compare readings across surfaces, assemblies, and hidden cavities. Your detection methods should pair inspection tools with calibrated meters so you can quantify moisture levels in drywall, framing, masonry, and insulation. When patterns shift, you can refine leak identification and isolate the most likely entry point. Strong assessment protocols help you distinguish active intrusion from residual dampness and guide targeted damage assessment. You furthermore gain a clearer basis for humidity control, as you can see whether conditions support drying or sustain continued accumulation. In practice, you use these findings to prioritize repairs and verify stabilization. Identifying and addressing moisture source identification early prevents secondary damage like mold growth and structural deterioration.
How Thermal Imaging Spots Heat Loss
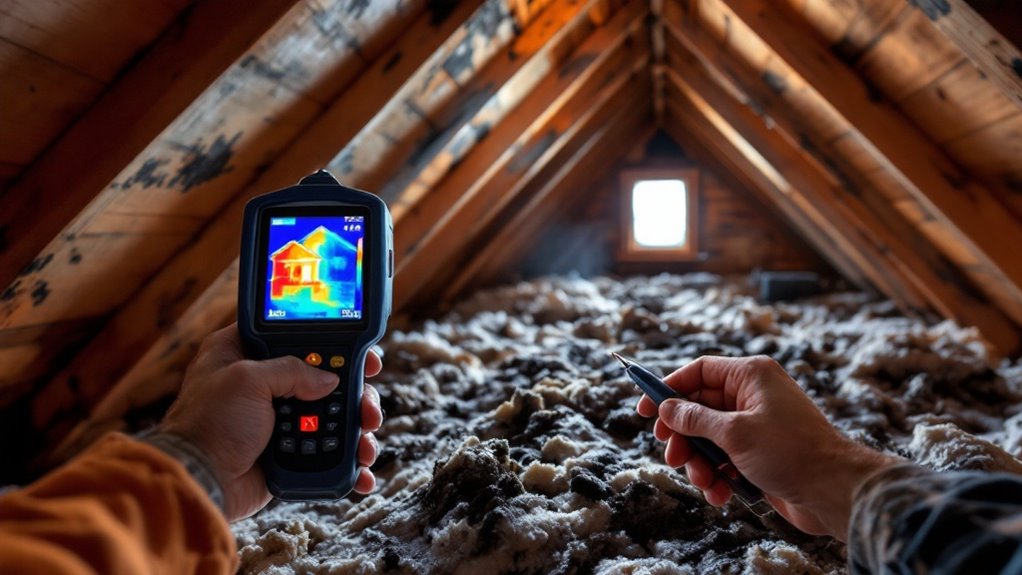
When you use thermal imaging, you can spot heat loss by identifying surface temperature differences that point to missing insulation, air leakage, thermal bridging, or wet building materials. You read the image as a heat map: warmer zones usually indicate escaping conditioned air, while cooler bands often mark areas where heat retention is compromised. By comparing surfaces under similar conditions, you isolate anomalies and quantify where the envelope underperforms. You can then target attic planes, rim joists, wall cavities, and window perimeters with surgical precision. This diagnostic process improves energy efficiency since you’re no longer guessing where losses occur. Instead, you’re verifying defects, prioritizing corrective action, and documenting thermal performance with objective visual evidence. Wet building materials detected through thermal imaging often signal moisture and hidden damage that requires immediate professional restoration to prevent mold growth and structural compromise.
Signs You Need Moisture Mapping

Thermal irregularities often point beyond heat loss and into hidden moisture problems. You need moisture mapping when your building shows persistent staining, peeling finishes, warped trim, or recurring odors that don’t match visible conditions. You should likewise suspect concealed intrusion if surfaces feel cool, drywall softens, or humidity stays raised in one zone. These moisture symptoms rarely resolve on their own; they indicate trapped water, vapor migration, or capillary loading. Moisture mapping techniques let you localize unusual readings, compare affected and unaffected assemblies, and verify whether the irregularity is active or residual. When you see intermittent discoloration after rain, or when repairs keep failing, mapping gives you a defensible diagnostic baseline. Unchecked moisture intrusion can also facilitate mold growth throughout your building’s ductwork and air handlers, potentially affecting air quality across multiple zones. Use it before damage spreads, materials degrade, or you commit to invasive inspection and costly corrective work.
Where Hidden Leaks Often Start
Hidden leaks often begin at roof penetrations, where flashing, vents, and fasteners can fail and let water enter the assembly. You should likewise inspect window seals and plumbing joints, since sealant breakdown and loose connections commonly create concealed moisture paths. These points usually show early thermal anomalies and localized moisture readings before visible damage appears. Identifying and addressing these moisture issues is critical for environmental remediation and protecting the structural integrity of your building.
Roof Penetrations
Roof penetrations are frequent leak sources since flashings, seals, and fasteners concentrate stress where the roof assembly is interrupted. You should inspect each penetration during roof maintenance, as small defects can bypass moisture barriers and compromise structural integrity. Focus on sealant inspection around pipes, curbs, vents, and equipment bases; hardened, split, or debonded sealant often signals failure. Watch for drainage issues that pond water against lap edges and accelerate deterioration. Match weatherproofing techniques to the roofing materials and the substrate, then verify penetration sealing with compatible primers, flashings, and fastener patterns. Thermal imaging helps you trace cool, damp anomalies radiating from hidden breaches, while moisture mapping confirms whether water has migrated below the membrane. Professional indoor air quality assessments can identify secondary moisture problems that develop after water infiltration compromises building interiors. Diagnose early, and you’ll limit repair scope and prevent interior damage.
Window Seals
Window seals can fail just as quietly as roof penetrations, and the first signs often show up long before visible staining appears. You should inspect perimeter joints, glazing interfaces, and frame alterations with thermal imaging to detect temperature anomalies that indicate air leakage or moisture entry. Then correlate those patterns with moisture mapping to confirm whether the assembly has lost window seal effectiveness. Pay close attention to differential cooling at corners, sash edges, and sill ends, where degraded sealant often breaks continuity. You can additionally assess sealant longevity by checking adhesion, cracking, shrinkage, and separation from substrate. When you document these conditions, you’ll distinguish simple condensation from active intrusion and prioritize repairs before hidden damage spreads into adjacent finishes and framing systems. These window seal failures often introduce contaminants through air leakage and moisture entry, which can recirculate throughout commercial buildings and compromise indoor air quality if left unaddressed.
Plumbing Joints
Plumbing joints often fail at fittings, unions, junctions, and supply connections long before you see staining, so you should scan these areas with thermal imaging and moisture mapping to catch the earliest temperature shifts and damp signatures. You can then compare adjacent materials for irregular cooling, pinpointing plumbing leaks that haven’t reached the finish surface. Check soldered, threaded, and compression joints for uneven thermal patterns, then verify with calibrated moisture readings. This lets you distinguish active leakage from residual condensation and avoid false positives. When you document each irregularity, note pipe material, pressure conditions, and access constraints so you can track trends over time. AirPro’s water damage restoration process includes extraction, drying, and moisture mapping to prevent structural damage from hidden leaks. Your goal is to confirm joint integrity before a minor seep becomes structural damage, mold growth, or hidden corrosion.
How Thermal Imaging Finds Insulation Gaps
Thermal imaging lets you detect heat loss by showing surface temperature differences across walls, ceilings, and floors. You can identify insulation gaps when warmer or cooler bands outline missing, compressed, or displaced material. This diagnostic pattern helps you pinpoint problem areas before you open the assembly. Early detection of these environmental issues prevents costly problems that can escalate if discovered during construction or post-purchase.
Detecting Heat Loss
When you scan a building with infrared imaging, cooler streaks, patches, or bands often reveal where heat is escaping through insulation gaps, air leaks, or thermal bridges. You’ll read these anomalies as temperature differentials, then correlate them with construction details to isolate the loss path. Focus on junctions at rims, headers, slab edges, and penetrations, where envelope continuity often degrades. By comparing interior and exterior conditions, you can distinguish real losses from transient surface effects. This diagnostic approach sharpens heat retention analysis and improves energy efficiency by targeting corrective work where performance is weakest. Use calibrated images, stable weather, and consistent camera angle so your interpretation stays defensible. With disciplined scanning, you’ll identify thermal weakness quickly and quantify its impact confidently. When thermal imaging reveals moisture patterns alongside heat loss, indoor air quality services can evaluate ventilation and environmental factors to address the root causes of both energy loss and potential mold development.
Revealing Missing Insulation
Missing insulation shows up in infrared images as abrupt temperature contrasts, often as cold voids in heating season or hot patches in cooling season. You read these patterns against known insulation types and compare them to adjacent assemblies to confirm coverage loss. – Verify framing bays, headers, and rim joists. – Compare suspect zones to intact cavities. – Check for compression, displacement, or missing batts. – Distinguish thermal bridging from true gaps. – Document locations for targeted correction. When you map these anomalies, you pinpoint leakage paths that weaken energy efficiency and increase load. Use stable indoor-outdoor temperature differences, then scan slowly to avoid false readings from air movement, sun, or surface emissivity. You’ll identify defects precisely enough to guide repair without opening every wall. Addressing insulation gaps also supports indoor air quality by reducing infiltration paths that allow unconditioned air and potential contaminants to enter the building envelope.
Where Hidden Building Problems Hide

Hidden building problems often start where you can’t see them: behind finished walls, under roofing membranes, around window and door perimeters, beneath slab edges, and inside ceiling cavities. You should target hidden damage where moisture sources accumulate and threaten structural integrity. Building materials age differently, so inspection techniques must account for assembly type, property management history, and building age. Environmental factors, especially seasonal changes, drive intermittent intrusion and can mask active leakage.
| Zone | Risk | Focus |
|---|---|---|
| Wall cavities | concealed leaks | exterior interfaces |
| Roof assemblies | membrane failure | penetrations |
| Slab edges | capillary entry | foundation joints |
Use preventative measures early, before degradation spreads. You’ll find the highest-value search areas where repetitive loading, differential movement, or poor detailing concentrate moisture and accelerate failure.
How to Read Moisture and Temperature Patterns
To read moisture and temperature patterns, you compare anomalies against the surrounding material, not against a single absolute value. You map gradients, then judge whether moisture indicators align with temperature fluctuations across adjacent surfaces. Sharp edges, repeating bands, and isolated cold spots usually signal abnormal conditions. Use pattern recognition to separate true distress from normal thermal behavior.
- Compare like materials in the same plane
- Note symmetry breaks and edge effects
- Rank anomalies by contrast, not size
- Cross-check wetness signatures with surface cooling
- Document repeatable patterns for later verification
When you read the field this way, you gain diagnostic confidence. You’re not guessing; you’re classifying evidence, testing consistency, and narrowing interpretation with each scan.
How Inspectors Trace Moisture to Its Source

You start by correlating visual clues with moisture patterns, looking for staining, swelling, efflorescence, and other surface anomalies that point to active intrusion. You then verify suspect areas with thermal scans to confirm temperature differentials that align with evaporative cooling or concealed wetting. From there, you trace the source path by following the gradient back to the entry point, comparing building assemblies, penetrations, and drainage conditions until you isolate the origin.
Visual Clues And Patterns
Moisture rarely spreads randomly; it follows gravity, capillary action, and building pathways, so inspectors read stains, swelling, discoloration, and material decay as a map back to the source. You should compare visual patterns across finishes, framing, and penetrations to separate active leaks from legacy damage.
- Staining at fasteners often flags localized ingress.
- Bubbling paint can indicate trapped moisture below the surface.
- Baseboard distortion points to repeated wetting.
- Efflorescence on masonry suggests migration through porous materials.
- Mold staining near joints often traces a failed seal.
You’ll sharpen diagnosis by matching moisture indicators to construction details, then checking whether the pattern aligns with plumbing, roofing, or envelope shifts. Consistency matters: the sharper the pattern, the nearer you’re getting to the origin.
Thermal Scan Verification
Thermal imaging adds a temperature-based layer to the visual clues you’ve already mapped, helping you verify whether a stain, swelling pattern, or joint failure is tied to active moisture rather than old damage. You read cooler surfaces, edge gradients, and irregular thermal breaks as diagnostic signals, then compare them with adjacent materials under similar conditions. This cross-check improves inspection accuracy, as you’re not relying on appearance alone. It furthermore reveals thermal scan benefits: faster confirmation, sharper differentiation between wet and dry zones, and stronger documentation for repair decisions. You should capture images at consistent angles, note ambient conditions, and repeat scans when surfaces equilibrate. When the thermal pattern aligns with the visible defect, you’ve built a defensible verification that supports targeted remediation and reduces guesswork.
Source Path Investigation
Once you’ve verified active moisture, trace the path backward by testing the most likely entry points, changes, and concealed cavities that could feed the affected area. You use moisture sources, not assumptions, to isolate the origin with mapping techniques that align readings, finishes, and assemblies.
- Check roofs, flashings, and penetrations.
- Inspect plumbing, traps, and supply lines.
- Probe window perimeters and sealant joints.
- Compare gradients across walls and floors.
- Confirm hidden cavities with thermal anomalies.
You then correlate meter spikes with material shifts, as water often travels before it appears. When the pattern tightens, verify the source by timing, shutoff tests, and repeat scans. That disciplined sequence lets you distinguish active ingress from residual wetting and document the exact failure path for repair planning.
What Repairs Follow an Inspection
After an inspection, you move from locating anomalies to correcting the conditions that caused them. You then match repair methods to the defect profile: seal failed penetrations, replace damaged insulation, reflash joints, and remove compromised finishes. Your material selection should reflect substrate compatibility, vapor behavior, and exposure class. You additionally weigh cost considerations against scope, labor access, and required demolition. Compare contractor options by licensing, moisture diagnostics skill, and documentation quality, as precise repairs depend on disciplined execution. Set project timelines around drying verification, sequencing, and occupancy limits. Review warranty implications before you authorize substitutions or partial fixes. Follow safety protocols for electrical isolation, containment, and respiratory protection, especially where hidden mold, wet insulation, or energized systems are present.
How to Prevent Future Moisture Damage
To prevent future moisture damage, you need to eliminate the pathways that let water in and the conditions that let it linger. Inspect roofs, flashings, seals, and penetrations on a fixed schedule. Verify that drainage slopes away, gutters discharge cleanly, and HVAC condensate moves properly. Maintain moisture barriers at foundations, walls, and wet rooms, and replace failed sealants before capillary wicking starts.
- Document readings after storms
- Track humidity in attics and crawlspaces
- Test vulnerable joints with infrared scans
- Repair cracks before freeze-thaw expansion
- Keep preventative maintenance intervals consistent
You’ll reduce hidden decay when you control bulk water, vapor drive, and trapped humidity together. Use diagnostics to confirm each correction, not guesswork.
Frequently Asked Questions
How Long Does a Moisture Mapping Inspection Usually Take?
You’ll usually spend 1–4 hours on a moisture mapping inspection, depending on area size and complexity. Advanced detection techniques can extend inspection duration, but you’ll gain precise diagnostic data for confident remediation decisions.
Can Thermal Imaging Detect Hidden Mold Behind Walls?
Yes—thermal imaging can suggest hidden mold behind walls by revealing moisture anomalies, but you’ll need confirmatory mold detection and thermal analysis. You can’t see mold itself; you’re diagnosing temperature patterns that indicate probable colonization.
Do Inspectors Need to Enter Every Room During an Inspection?
Not always; you need room access to evaluate each zone, but inspection limits can restrict entry. You should document inaccessible areas, note reduced confidence, and use thermal scans or moisture readings to target follow-up diagnostics.
What Weather Conditions Affect Thermal Imaging Accuracy?
You’ll get the cleanest read on calm, dry days; wind, rain, snow, direct sun, and extreme humidity skew thermal variations and moisture detection. You should inspect during stable conditions for sharper, diagnostic results.
How Often Should Buildings Be Inspected for Hidden Moisture Issues?
You should inspect buildings annually, and after leaks, storms, or renovations. Your inspection frequency should increase for high-risk structures. Use detection technologies to verify concealed dampness early, before deterioration, mold growth, or costly structural damage.
Conclusion
When you pair moisture mapping with thermal imaging, you test a theory instead of guessing. You confirm where water is entering, where insulation is failing, and how hidden defects spread through the structure. That evidence lets you trace the source, target repairs, and reduce repeat damage. If you spot staining, odors, or temperature anomalies, you shouldn’t wait. A precise inspection gives you the diagnostic picture you need to protect the building before minor leaks become major failures.