
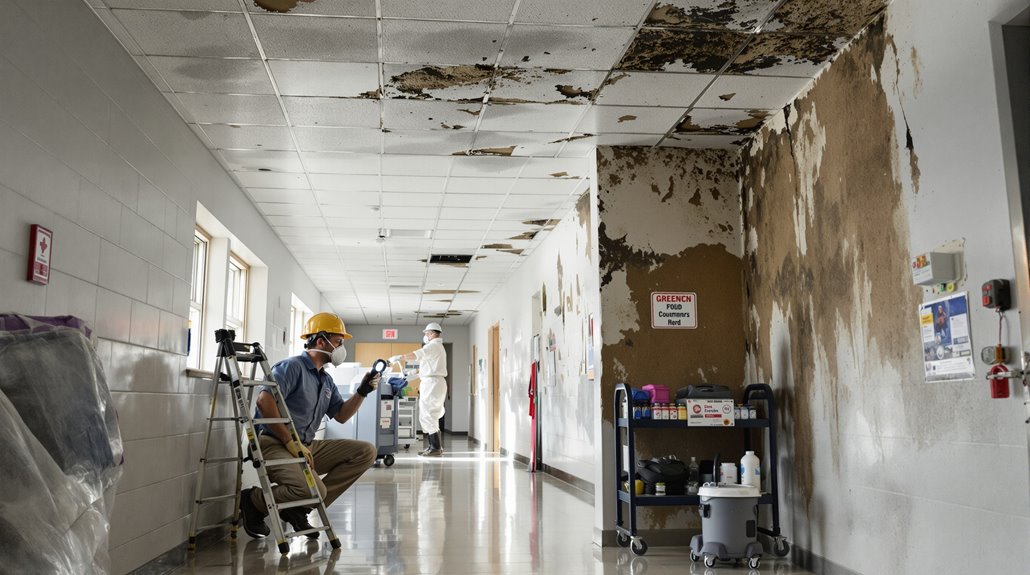
When you spot musty odors, water stains, or health complaints, don’t wait—act fast. Restrict access to the affected area, notify your emergency response team, and bring in a certified industrial hygienist for air and surface sampling. Compare indoor spore counts to outdoor baselines before deciding on remediation. Document everything for regulatory and insurance purposes. Get this sequence right, and you’ll protect students, staff, and your district’s liability—there’s more you’ll want to know before the next steps.
Key Takeaways
- Inspect concealed spaces, HVAC systems, and water-damaged areas to identify warning signs of mold contamination.
- Confirm suspected mold through surface, air, and moisture sampling conducted by a certified industrial hygienist.
- Secure affected areas immediately using barriers, negative air pressure, and restricted access to prevent exposure.
- Activate an emergency response team with defined roles to manage remediation and communication efforts.
- Document findings, share timely updates, and provide health guidance to staff, parents, and stakeholders.
Recognize the Warning Signs of Mold
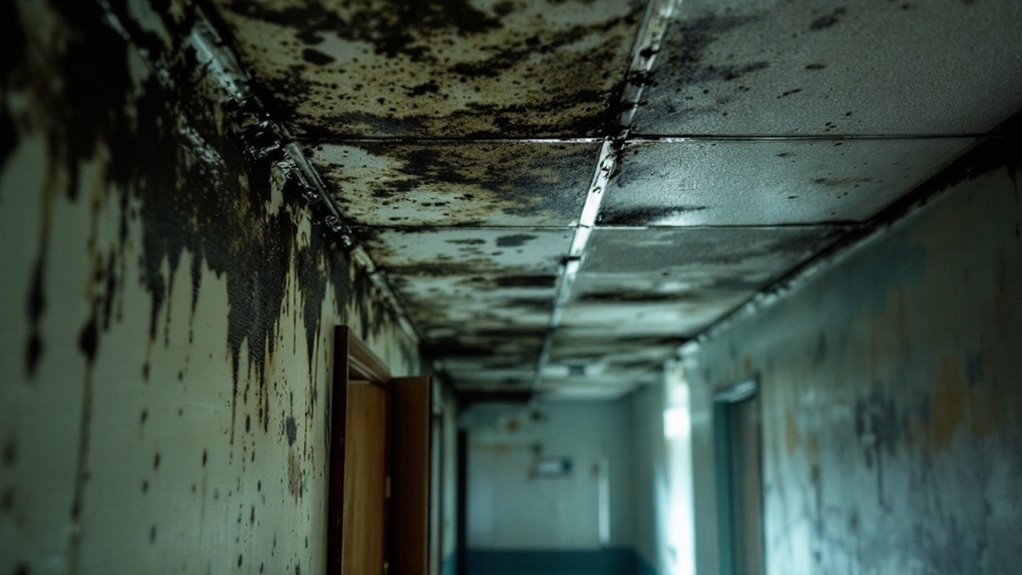
Owing to mold colonies often developing in concealed spaces before visible symptoms appear, you’ll need to conduct systematic inspections rather than rely on obvious signs alone. Check HVAC systems, ceiling tiles, and wall cavities for discoloration, musty odors, or moisture staining—these indicators often precede visible growth by weeks. You’ll want to document any water intrusion history, since past leaks correlate directly with current contamination risk. Different mold types present varying health risks: Stachybotrys chartarum poses severe respiratory threats, while Aspergillus and Penicillium species trigger allergic reactions and asthma exacerbation in sensitive populations. Track student and staff health complaints—recurring headaches, coughing, or eye irritation clustered in specific areas often signal hidden contamination. Correlating occupant symptoms with building zones gives you actionable data for targeted remediation before problems escalate into costly, disruptive interventions. When contamination is confirmed, post-remediation air testing provides objective verification that remediation efforts have successfully restored safe indoor air quality for students and staff.
Confirm You Actually Have a Mold Problem
How do you separate a genuine mold problem from a false alarm? Don’t rely on visual inspection alone. Effective mold detection methods combine surface sampling, air sampling, and moisture mapping to confirm colonization versus surface staining or mistaken debris.
Engage a certified industrial hygienist to conduct third-party testing. Independent verification protects you from liability disputes and guarantees data integrity when parents or staff question your findings. Compare spore counts against outdoor baseline levels—elevated indoor concentrations relative to ambient air signal a genuine problem, not background exposure.
Document everything: sampling locations, lab methodologies, and chain-of-custody records. This data becomes your foundation for remediation decisions and regulatory compliance. Accurate indoor air quality assessment removes guesswork, letting you act on evidence rather than assumption or panic. Partnering with environmental cleaning professionals ensures your facility maintains the safe, compliant spaces that students and staff deserve.
Secure the Area and Limit Exposure

Once your testing confirms increased spore counts, don’t wait for lab reports to finish before restricting access. Post signage, lock affected rooms, and reroute HVAC airflow to prevent cross-contamination into adjacent zones. Effective mold containment requires physical barriers—6-mil poly sheeting, negative air pressure machines, and sealed doorways—to isolate the impacted area from occupied spaces.
Notify staff, parents, and district safety officers immediately; document every notification for regulatory compliance under OSHA and state indoor air quality statutes. Relocate classes or offices as needed, and suspend non-essential entry until remediation begins.
Exposure reduction extends beyond containment: adjust ventilation schedules, supply HEPA air scrubbers, and instruct custodial staff to avoid disturbing visible growth, which can aerosolize spores and worsen contamination during interim monitoring periods. Partner with certified environmental professionals who offer post-remediation air testing to verify that mold removal has been completed effectively and safely.
Notify Your Emergency Response Team
As mold containment demands more than custodial judgment, you need a formal emergency response team activated the moment spore counts confirm contamination. You can’t rely on ad hoc decision-making when regulatory compliance and occupant safety hang in the balance. Establishing clear emergency protocols before an incident occurs eliminates confusion during the critical first hours.
Assign team roles with precision:
- Incident Commander — coordinates all response actions and communicates with district leadership.
- Facilities Lead — oversees HVAC isolation and containment barrier installation.
- Health & Safety Officer — manages air quality testing and occupant notifications.
- Communications Coordinator — handles parent, staff, and media inquiries.
You’ll minimize liability and accelerate remediation by ensuring each member understands their documented responsibilities before spores ever appear. For mold situations requiring professional intervention, partnering with specialists in mold remediation and inspection ensures compliance with environmental health standards and accelerates the restoration process.
Bring In a Certified Mold Inspector

Once you’ve activated your emergency response team, your next step is securing a certified mold inspector—not a general contractor or maintenance staff member. Certification through organizations like the IICRC or ACAC guarantees the inspector follows standardized protocols for sampling, testing, and documentation that will hold up if you face litigation or regulatory scrutiny. Expect a thorough inspection to include air and surface sampling, moisture mapping with infrared cameras, and lab analysis to identify mold species and concentration levels, giving you the data you need to determine remediation scope and reoccupancy timelines. A comprehensive inspection should also assess indoor air quality throughout the facility to ensure a complete understanding of environmental conditions affecting student and staff safety.
Why Certification Matters
Since mold identification often requires more than a visual assessment, you need a certified mold inspector who can apply standardized protocols recognized by industry bodies like the IICRC or ACAC. Certification benefits extend beyond credentials—they guarantee inspectors follow documented industry standards for sampling, analysis, and reporting. You gain accountability, technical rigor, and defensible data if legal or insurance disputes arise.
- Standardized sampling methods – Certified inspectors use validated air and surface sampling techniques.
- Chain-of-custody protocols – Documentation guarantees lab results hold up under scrutiny.
- Regulatory compliance – Inspections align with EPA and OSHA guidance for indoor air quality.
- Liability protection – Certification demonstrates due diligence if litigation occurs.
AirPro Environmental brings 40+ years of industry experience to mold assessment, ensuring your school receives inspections grounded in deep understanding of building science and regulatory requirements. You’re not just hiring an inspector—you’re securing verifiable, defensible expertise.
What Inspections Involve
Since visible mold represents only a fraction of contamination risk, a certified inspector’s assessment starts long before any physical walkthrough. You’ll need to review building history, prior water intrusion events, and HVAC maintenance logs first. Inspectors then select from several inspection types based on your facility’s risk profile: baseline assessments, post-remediation verification, or complaint-driven investigations. Each type carries distinct protocols—air sampling, surface sampling, moisture mapping, and thermal imaging—calibrated to your specific concern.
You’ll additionally establish inspection frequency according to occupancy patterns and prior findings. High-risk zones like locker rooms or below-grade classrooms warrant quarterly checks, while low-risk administrative spaces may only require annual review. Document every inspection’s scope, methodology, and findings—this creates the evidentiary record regulators and insurers will expect. AirPro’s defined scopes, documented progress approach ensures that your inspection records remain defensible and transparent throughout the assessment process.
Interpret Your Mold Test Results
Once your inspector delivers the lab report, you’ll need to translate raw spore counts into actionable data. Compare indoor spore levels against outdoor baseline samples—a ratio exceeding 1.5:1 for a specific mold genus signals amplification requiring remediation. Focus on identifying threshold levels that trigger regulatory action, since most states lack universal exposure limits but rely on comparative analysis between indoor and outdoor air quality to determine when intervention becomes mandatory. AirPro’s detailed reports include levels of contaminants and associated risks with clear communication of air quality issues to help facility administrators understand the results and next steps for remediation.
Understanding Lab Report Results
Since raw spore counts mean little without context, you’ll need to compare your indoor results against outdoor baseline samples collected the same day. A lab report showing indoor counts exceeding outdoor levels signals active amplification, not background contamination.
Focus your analysis on these four elements:
- Mold types identified: Distinguish between common outdoor genera (Cladosporium, Alternaria) and moisture-indicator species (Stachybotrys, Chaetomium, Aspergillus/Penicillium).
- Spore concentration ratios: Calculate indoor-to-outdoor percentages to quantify amplification severity.
- Species-specific health impacts: Cross-reference identified genera against EPA and CDC toxicity classifications.
- Detection thresholds: Confirm your lab’s reporting limits meet AIHA-recommended sensitivity for accurate risk assessment.
Request culturable and non-culturable analysis together—each method reveals different exposure risks your remediation plan must address. For school facilities specifically, industrial mold remediation protocols ensure containment and HEPA cleaning meet the stringent air quality standards required to protect students and staff during the remediation process.
Comparing Spore Count Levels
Numbers alone won’t tell you whether you’re facing a genuine problem or normal background exposure—context determines everything. You need to compare indoor spore counts against outdoor baseline samples collected simultaneously. If indoor levels exceed outdoor concentrations, or if you’re seeing spore types indoors that don’t appear outside, you’ve got evidence of active indoor growth rather than incidental drift.
Pay attention to which species dominate your results. Stachybotrys, Aspergillus, and Penicillium carry different health impacts and warrant different urgency levels. Total spore count matters less than composition—50,000 spores/m³ of common outdoor fungi differs vastly from lower counts of toxigenic species.
Don’t rely on a single threshold number. Use ratios, species identification, and outdoor comparisons together to determine whether remediation is truly necessary. Early detection through comprehensive mold testing prevents costly problems from escalating and provides the clarity needed to support informed decisions about your school facility.
Identifying Actionable Threshold Levels
Although no federal agency publishes legally binding numeric limits for airborne mold spores, that doesn’t leave you without benchmarks for decision-making. Industry consensus, drawn from IICRC S520 guidance and comparative field data, gives you defensible mold thresholds for triggering remediation.
- Indoor-to-outdoor ratio – Flag results when indoor spore counts exceed outdoor counts by 3-5x for the same genera.
- Genera of concern – Treat any detection of Stachybotrys or Chaetomium as actionable, regardless of concentration.
- Aggregate spore count – Total counts above 1,500 spores/m³ warrant investigation.
- Species divergence – Indoor-only species absent outdoors signal amplification.
Apply these actionable levels consistently, and you’ll standardize your response protocol across every building in your portfolio.
Should You Close the Affected Room?
When should you shut a room’s doors and stop foot traffic? Close the space when visible mold exceeds 10 square feet, when occupants report acute respiratory symptoms, or when moisture readings confirm active water intrusion. These thresholds prioritize student safety over convenience.
Don’t rely on odor alone—document conditions with photos, moisture meter readings, and occupant complaint logs before deciding. If remediation requires HEPA filtration, negative air pressure, or containment barriers, closure isn’t optional; it’s mandated by IICRC S520 protocols.
Consider room usage patterns before relocating classes: high-traffic spaces demand faster action than storage areas. Notify custodial staff, restrict access with signage, and coordinate with your remediation contractor on reoccupancy testing before reopening. Never guess—verify clearance with post-remediation air sampling.
Choose the Right Mold Remediation Approach

Three factors determine your remediation strategy: contamination size, material porosity, and HVAC involvement. EPA guidelines classify contamination into small (under 10 sq ft), medium (10-100 sq ft), and large (over 100 sq ft) categories, each requiring distinct remediation techniques. Match your approach to these conditions:
- Small isolated areas: Use containment barriers, HEPA vacuuming, and biocide application by trained staff.
- Porous materials: Remove and discard drywall, ceiling tiles, and carpet—these can’t be fully decontaminated.
- Non-porous surfaces: Clean with HEPA filtration and antimicrobial solutions, then verify with post-remediation testing.
- HVAC contamination: Engage certified professionals immediately; airborne mold types spread rapidly through ductwork.
Don’t guess—match technique to contamination scope and material composition for regulatory compliance.
Fix the Moisture Source for Good
Remediation without moisture correction guarantees recurrence—mold returns within weeks if you don’t eliminate the water source feeding it. Effective moisture control requires identifying root causes: roof leaks, HVAC condensation, plumbing failures, or vapor intrusion through slab foundations. You need building envelope assessments, not surface-level patches.
Long term solutions demand documented moisture mapping and relative humidity monitoring below 60% year-round.
| Moisture Source | Detection Method | Correction Action |
|---|---|---|
| Roof leaks | Infrared thermography | Membrane repair/replacement |
| HVAC condensation | Psychrometric analysis | Duct insulation, drain pan service |
| Plumbing failures | Moisture meter readings | Pipe replacement, seal penetrations |
| Slab vapor intrusion | Calcium chloride testing | Vapor barrier installation |
Address each source systematically—partial fixes leave pathways for recontamination and compromise regulatory compliance.
Communicate Clearly With Parents and Staff

Once you’ve addressed the moisture source, you can’t let remediation happen in a communication vacuum—parents and staff need documented, timely information about what’s occurring in the building. You’ll want to issue written updates that specify testing results, remediation timelines, and affected areas, citing EPA or state guidelines where applicable. Your communication should likewise outline health and safety protocols, including symptoms to monitor and steps for reporting concerns, so stakeholders understand both the risk and your response.
Share Timely Written Updates
When mold’s identified in your school, you can’t afford to let rumors fill the information gap—you need a written communication plan that goes out within 24 to 48 hours of confirmed findings. Effective mold communication strategies rely on documented, timestamped updates that establish institutional credibility and satisfy stakeholder engagement expectations across parents, staff, and district officials.
Your written updates should include:
- Findings summary: Lab results, affected square footage, and mold species identified.
- Remediation timeline: Contractor start dates, containment protocols, and projected completion.
- Health guidance: Symptoms to monitor and who to contact for concerns.
- Next steps: Scheduled follow-up testing and communication dates.
Distribute updates through email, your district portal, and physical postings simultaneously. Consistency across channels prevents misinformation and demonstrates regulatory compliance to inspectors reviewing your response documentation.
Explain Remediation Steps Taken
Detailing your remediation process transforms abstract reassurance into verifiable action. You need to specify the mold types identified through lab analysis, since Aspergillus, Penicillium, and Stachybotrys each carry different exposure implications and dictate different remediation techniques. Explain containment methods used—negative air pressure, HEPA filtration, and physical barriers—to demonstrate adherence to IICRC S520 standards.
Outline the sequence: removal of porous materials, antimicrobial treatment of non-porous surfaces, and post-remediation verification testing conducted by a third-party industrial hygienist. Cite clearance criteria your facility must meet before reoccupation.
Avoid vague assurances like “we cleaned the area.” Instead, quantify results: spore counts, moisture readings, and timeline benchmarks. This precision demonstrates regulatory compliance and gives stakeholders concrete evidence that remediation techniques matched the mold types found, not generic assumptions.
Provide Health and Safety Guidance
Since remediation data alone won’t satisfy anxious parents or unions, you’ll need to translate lab findings into actionable health guidance that addresses specific symptoms linked to specific exposures. Frame communications around documented health risks—respiratory irritation, allergic reactions, asthma exacerbation—correlated to spore concentrations identified during testing.
- Health regulations compliance: Cite EPA and OSHA thresholds justifying your safety protocols and remediation timeline.
- Indoor air quality data: Share before/after readings demonstrating ventilation improvements and filtration effectiveness.
- Prevention strategies: Outline moisture control, cleaning techniques, and inspection schedules preventing recurrence.
- Emergency procedures: Detail evacuation protocols and reporting channels for suspected exposure incidents.
Launch staff training programs covering symptom recognition and reporting procedures. Build student awareness through age-appropriate materials explaining precautions without inducing panic. Document every communication—transparency now prevents litigation later.
What to Tell Teachers Before Students Return

Before teachers walk back into their classrooms, you’ll need to brief them on the specific remediation protocols followed under industry standards such as the IICRC S520, including containment methods, air filtration device (AFD) placement, and post-remediation verification (PRV) sampling results. Address teacher concerns directly by presenting third-party lab data confirming spore counts fall within normal fungal ecology ranges. Explain what remediation crews altered—HVAC filtration upgrades, moisture source repairs, or negative air pressure zones—and clarify that clearance testing means classroom safety has been independently verified, not assumed. Provide written documentation they can reference or share with concerned parents. Encourage teachers to report any recurring odors, visible staining, or humidity issues immediately, establishing a clear communication channel between classroom staff and facilities management for ongoing monitoring.
Keep Records That Protect Your School
Administrators routinely underestimate how much documentation matters until litigation, insurance claims, or regulatory audits demand it. Robust record keeping isn’t bureaucratic overhead—it’s your primary defense when mold complaints escalate into legal or financial disputes. Establish documentation practices that create an unbroken chain of evidence from initial detection through final remediation verification.
Your records should include:
- Inspection reports with dated photographs, moisture readings, and inspector credentials
- Remediation contracts specifying scope, methods, and industry standards followed (IICRC S520)
- Air quality test results from before, during, and after remediation, including lab certifications
- Communication logs documenting notifications to staff, parents, and health officials
Store these records centrally, backed up digitally, and retained for at least the statute of limitations period applicable in your jurisdiction. Incomplete documentation weakens your position regardless of how well remediation actually performed.
Build a Mold Prevention Plan for Next Year
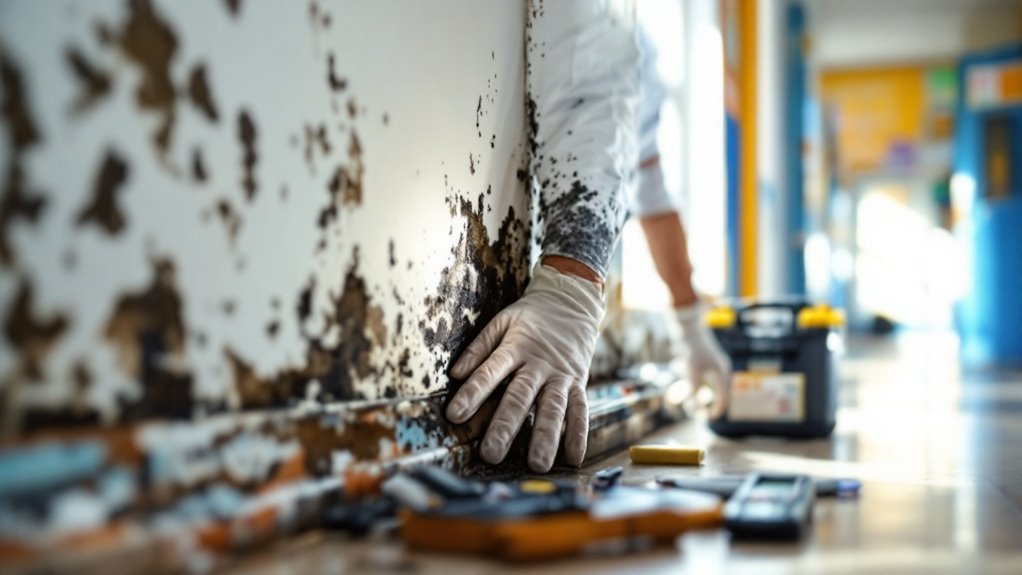
Once remediation wraps up, you can’t afford to treat mold as a solved problem—you need a documented prevention strategy that addresses the conditions allowing growth in the first place. Start by scheduling quarterly HVAC inspections and moisture audits in areas with prior contamination history. Set humidity thresholds—ideally below 60%—and install monitoring sensors in vulnerable zones like basements, kitchens, and locker rooms.
Your preventive measures should include a maintenance calendar assigning specific staff to specific tasks, with sign-off requirements for accountability. Document every inspection, repair, and threshold reading; this creates the paper trail regulators expect during compliance reviews.
For long term strategies, budget for envelope improvements—roof repairs, window seals, drainage upgrades—that eliminate recurring moisture sources rather than just managing symptoms year after year.
Frequently Asked Questions
Who Pays for Mold Remediation—The School District or Insurance?
You’ll typically pursue insurance coverage options first, filing claims under property policies covering water damage or resulting mold. Nevertheless, you’ll need documented mold assessment protocols proving causation and timeline compliance—insurers often deny claims lacking proper inspection records or delayed remediation response.
Can Mold Exposure Create Long-Term Legal Liability for Administrators?
An ounce of prevention beats a pound of cure: yes, you’re exposed. Undocumented mold response invites legal consequences—negligence claims, regulatory citations, and liability for student health impacts—if you don’t inspect, document, and remediate per applicable standards.
How Much Does Professional Mold Remediation Typically Cost Schools?
You’ll typically spend $10-$30 per square foot on remediation, plus mold testing costs ($300-$1,000). Budget separately for prevention strategies—HVAC upgrades, moisture barriers, humidity controls—since you’re addressing root causes, not just symptomatic contamination removal.
Is It Safe for Staff to Clean Small Mold Spots Themselves?
Like defusing a small spark before it becomes a blaze, you can handle spots under 10 square feet—if you follow EPA mold cleaning guidelines and enforce staff safety precautions: gloves, N-95 respirators, and proper ventilation.
How Long Does Mold Remediation Usually Take to Complete?
Timelines vary from days to weeks, depending on contamination extent, affected materials, and mold growth factors like moisture source and humidity levels. You’ll need proper remediation techniques, containment verification, and post-remediation clearance testing before reoccupying spaces per regulatory guidelines.
Conclusion
Mold mismanagement means measurable liability. You can’t afford to guess—you need documented data, defensible decisions, and disciplined protocols. Confirm contamination, control containment, and communicate clearly with credentialed contractors before remediation resumes. Your records must reflect regulatory rigor: inspection reports, air-quality assessments, and corrective action timelines. Prevention protocols, not panicked patchwork, protect your facility’s future. Systematic surveillance and scheduled site inspections stop small spores from spiraling into structural, financial, and health hazards down the road.