

You should schedule an environmental inspection before you remove purchase contingencies, finalize financing, or start any demolition or renovation work. That timing lets you identify asbestos, lead, mold, soil contamination, water damage, and hidden storage or waste issues before they become costly liabilities. It likewise gives you time to renegotiate, request repairs, or halt unsafe work. Older homes and properties with industrial, flood, or renovation history need even earlier testing, and the details matter.
Key Takeaways
- Schedule the inspection before removing purchase contingencies or finalizing financing.
- For renovations, inspect before demolition, wall removal, or flooring replacement begins.
- Older homes should be tested early for lead, asbestos, mold, radon, and other legacy hazards.
- Inspect sooner if the property has industrial history, flooding, water damage, or strong chemical odors.
- Review findings before any intrusive work to guide repairs, abatement, permits, and risk management.
What an Environmental Inspection Covers

An environmental inspection covers the conditions, systems, and records that can create regulatory, health, or liability risk at a property. You’ll have the inspector review soil, groundwater, surface staining, indoor air, asbestos, lead-based paint, mold, radon, underground tanks, and waste handling areas. They’ll likewise assess ventilation, drainage, chemical storage, and prior remediation documentation to identify latent exposure pathways. The process tests whether the property complies with environmental regulations and reveals whether legacy contamination, poor maintenance, or undocumented alterations could trigger enforcement or cleanup obligations. You similarly gain a clearer view of inspection costs due to scope, sampling intensity, and laboratory analysis driving pricing. Professional environmental inspections provide 100% guaranteed air quality validation post-assessment, ensuring defensible results for your property evaluation. A focused inspection doesn’t guarantee a clean result, but it does give you defensible data for managing risk and planning next steps.
When to Schedule One Before Buying
If you’re buying a property, schedule the environmental inspection before you remove contingencies or finalize financing, so you can act on the findings while you still have negotiating leverage. You should treat this as a critical gate in your due diligence timeline, not a late-stage formality. Early testing lets you compare property assessments against known environmental regulations, estimate remediation exposure, and decide whether to renegotiate, request repairs, or exit the contract. If your lender, insurer, or jurisdiction imposes additional review, build in enough time to satisfy those requirements without compressing closing. Early detection of environmental issues prevents costly problems that can escalate if discovered post-purchase or during construction. You’ll reduce the risk of inheriting hidden liabilities and preserve your ability to make an informed, defensible purchase decision under pressure.
Why Older Homes Need Testing

Older homes often need environmental testing since building materials and site conditions can hide legacy hazards that newer construction is less likely to contain. You should treat property age as a proxy for unknown exposure pathways, as older materials may include lead-based coatings, asbestos, mercury-containing devices, or PCB-laden components. Historic hazards likewise persist in soils, basements, crawlspaces, and enclosed voids where moisture, settling, and poor ventilation concentrate contaminants. Even when surfaces look sound, deterioration can release fibers or dust into occupied spaces. Testing gives you defensible data on what’s present, where it’s located, and how severe the risk is. That information lets you prioritize controls, estimate liability, and avoid making decisions based on assumptions rather than measurable conditions. Professional asbestos abatement with clearance testing ensures that any identified hazards are properly remediated and that air quality meets safe limits before you occupy or renovate the space.
When Renovations Need an Environmental Inspection
Whenever you plan demolition, wall removal, flooring replacement, or any work that can disturb hidden building materials, you should schedule an environmental inspection first. You reduce exposure, avoid project delays, and stay aligned with renovation permits and environmental regulations.
- Verify suspect materials before contractors mobilize
- Identify compliance obligations early
- Prevent avoidable shutdowns and rework
- Protect occupants, workers, and adjacent units
- Document conditions for permit review
If you’re opening walls, stripping finishes, or altering mechanical chases, inspection gives you the data you need to control risk. You can then sequence the work correctly, coordinate certified asbestos specialists, and keep the renovation within legal and technical boundaries. Treat inspection as a preconstruction control, not an optional add-on.
Before Demolition: When Testing Matters
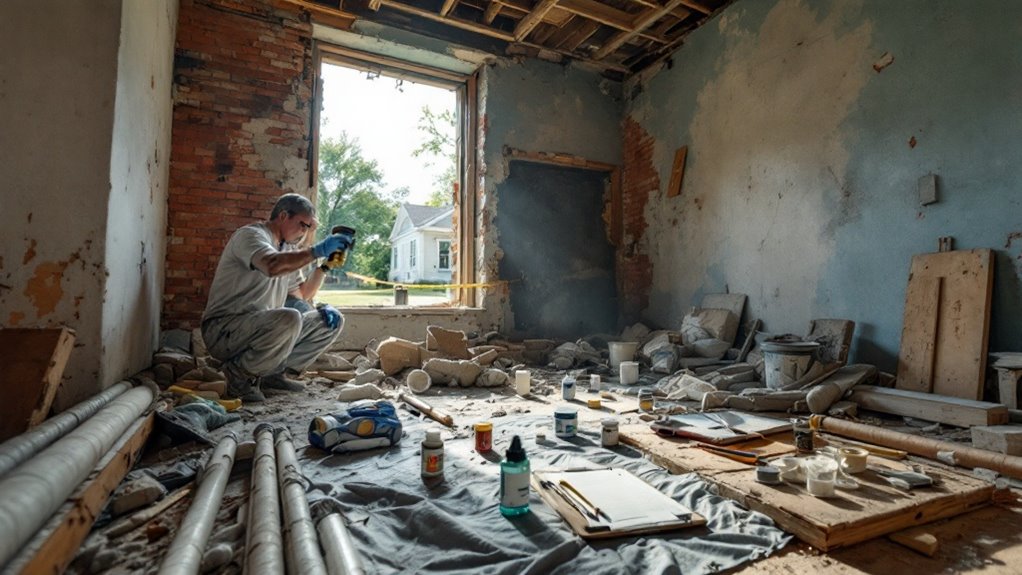
Before you start demolition, you need pre-demolition hazard testing to identify hidden risks before they’re disturbed. Asbestos and lead checks matter since demolition can release hazardous fibers and dust into the work area. If you confirm these materials early, you can control exposure, plan abatement, and avoid costly stoppages. Our assessment and planning process ensures coordination with your site leadership and safety teams to document all findings before work begins.
Pre-Demolition Hazard Testing
If you plan to demolish a structure, you should schedule hazard testing first so you can identify asbestos, lead-based paint, mold, PCBs, and other regulated materials before crews disturb them. You gain defensible hazard identification and can align testing methodologies with the building’s age, use, and renovation history.
- Target suspect materials early
- Sample hidden cavities systematically
- Map contamination before bidding
- Document findings for permits
- Control disposal and worker exposure
Without pre-demolition data, you risk delays, stop-work orders, and uncontrolled releases. You should use qualified inspectors, preserve chain of custody, and require lab-verified results before any mechanical teardown. AirPro’s post-remediation air testing ensures that any identified mold contamination is properly removed and verified safe before demolition proceeds. Precise testing turns unknown liabilities into managed scope, so you can budget accurately, sequence abatement, and protect occupants, workers, and adjacent property from avoidable contamination and regulatory escalation.
Asbestos And Lead Checks
Asbestos and lead checks should happen early in the demolition planning cycle so you can confirm where regulated materials are located before any disturbance begins. You’ll use targeted sampling to verify suspect insulation, flooring, paint, pipe wrap, and mastics, then map each positive finding against the work scope. This lets you separate abatement from general demolition and avoid uncontrolled fiber release or dust generation. You must follow asbestos regulations for notification, containment, air monitoring, and licensed removal, as minor errors can trigger shutdowns and liability. Lead-based coatings need equal discipline: test painted surfaces, evaluate substrate condition, and control lead exposure through wet methods, HEPA capture, and clearance verification. AirPro’s defined scopes and documented progress ensure that assessment findings are clearly communicated and defensible before demolition begins. If you skip these checks, you’ll inherit hidden hazard, schedule disruption, and costly remediation later.
Early Red Flags That Mean Test Now
If you see visible water damage, you should test now since moisture intrusion can quickly create hidden mold and material degradation. Strong chemical odors are another immediate trigger, as they can indicate volatile compounds, solvent exposure, or other indoor air hazards. Don’t wait for symptoms or worsening damage; confirm the source and scope with an environmental inspection right away. A rapid emergency response prevents environmental issues from escalating and protects the structural integrity of your property.
Visible Water Damage
One of the clearest early red flags is visible water damage, and you should test immediately when you see staining, bubbling paint, warped baseboards, or dark patches on ceilings, walls, or floors. These water damage indicators usually mean moisture intrusion has already bypassed finishes and may be affecting hidden assemblies.
- Inspect corners, window frames, and plumbing penetrations.
- Check for swelling, delamination, or softened drywall.
- Trace stains upward and outward to find the source.
- Document every affected area before remediation.
- Treat repeated spots as active failures, not cosmetic defects.
If you’re buying or renovating, don’t wait for the surface to dry and look harmless. Residual moisture can persist inside framing, insulation, and subfloors, increasing structural and microbial risk. Professional water damage restoration services can extract moisture and perform structural drying before hidden damage becomes costly. Schedule testing now, before you commit to repairs, pricing, or demolition.
Strong Chemical Odors
Strong chemical odors are another early warning sign that you shouldn’t ignore, as they often indicate active off-gassing, solvent exposure, fuel intrusion, or hidden mold growth. If you notice sharp, sweet, acrid, or petroleum-like smells, you should treat them as evidence of unstable indoor air quality, not cosmetic nuisance. Identify odor sources fast: new flooring, adhesives, stored chemicals, HVAC returns, crawl spaces, or plumbing voids. These emissions can signal chemical exposure levels that exceed safe long-term tolerance, especially in sealed buildings. Professional inspectors can identify these patterns by conducting tailored testing for specific questions, including air or surface sampling when necessary. Schedule an environmental inspection now so a professional can test air, bulk materials, and suspect cavities before you buy or renovate. Delaying can let contamination spread, increase remediation costs, and expose occupants to avoidable health risk.
Mold, Asbestos, Lead, and Soil Risks

When mold, asbestos, lead, or contaminated soil may be present, you should schedule an environmental inspection before anyone disturbs the property. A targeted assessment tells you whether hidden hazards require controls, sampling, or clearance before work starts.
- Verify visible mold growth and moisture sources
- Test suspect materials before demolition
- Check painted surfaces for lead hazards
- Sample soil near fill, drains, and foundations
- Define required mold remediation or asbestos removal steps
You reduce exposure, avoid uncontrolled dust, and protect workers, occupants, and your budget. If the inspection finds heightened risk, you can sequence abatement, containment, and disposal with precision instead of guessing. That’s how you prevent a small defect from becoming a project-stopping liability.
How Property History Changes the Timeline
A property’s history can move an inspection from optional to urgent if records show prior industrial use, fire damage, flooding, underground storage tanks, or repeated renovations. You should treat historical usage as a risk multiplier since it raises the odds of residual contamination, hidden alterations, and material deterioration. Older property age often means weaker documentation, so you can’t rely on assumptions or seller summaries. If permits, tax records, aerial photos, or prior reports reveal high-impact events, schedule the inspection before you commit to price, scope, or demolition plans. That timing lets you adjust contingencies and avoid irreversible work. In short, the deeper and more uncertain the history, the earlier you should act. Delay only increases exposure to remediation costs, schedule slippage, and compliance failures.
What Happens During the Inspection

During the inspection, the assessor walks the site, documents conditions, and looks for signs of contamination, moisture intrusion, structural distress, asbestos, lead, mold, or soil and groundwater impacts. You should expect a disciplined inspection process shaped by inspector qualifications and site-specific risk.
- Visual survey of buildings, utilities, and adjacent land
- Targeted interviews about use, spills, and repairs
- Review of accessible records, permits, and reports
- Field screening for suspect materials or odors
- Photo log and chain-of-custody for samples
You stay alert to restricted areas, hidden voids, and nonconforming materials, as those cues can indicate exposure pathways. The inspector maps anomalies, prioritizes suspect zones, and tests only where evidence supports a defensible scope. Every observation reduces uncertainty and helps you understand whether the property can tolerate purchase or renovation risk.
What to Do After the Inspection
Once the inspection ends, you should review the findings immediately and separate confirmed issues from suspected conditions that need follow-up testing. Then you can rank hazards by exposure pathway, legal impact, and project delay risk. Your post-inspection actions should include securing the report, mapping affected materials, and stopping any intrusive work that could spread contamination. If the data show increased risk, you should request targeted sampling, cost estimates, and remediation options before you commit to purchase or construction. Document every decision, as lenders, regulators, and contractors may later rely on your record. If the report is negative, keep it anyway as baseline evidence. You’ll protect schedule certainty, preserve negotiating leverage, and reduce liability when you act on the findings with disciplined, time-sensitive precision.
How to Choose the Right Inspector

To choose the right inspector, verify that they have direct experience with the specific environmental risk you’re evaluating—such as asbestos, mold, lead, underground storage tanks, or Phase I ESA work—and confirm that they understand the site’s regulatory context, sampling standards, and reporting requirements.
- Review Inspector Qualifications
- Request sample reports
- Compare Inspection Costs
- Check insurance and licensing
- Confirm turnaround time
You should additionally evaluate independence; avoid inspectors tied to remediation vendors. Ask how they’ll document chain of custody, QA/QC, and exceedance thresholds. Demand clear methods for field screening, laboratory selection, and data interpretation. A competent inspector will explain limitations before work starts and flag conditions that require invasive testing. If bids differ, don’t pick solely on price; low Inspection Costs can conceal weak scope or missing deliverables. Choose the inspector who reduces uncertainty, supports defensible decisions, and limits your liability.
Frequently Asked Questions
How Long Does an Environmental Inspection Usually Take?
You’ll usually need 1–4 hours onsite; complex sites can take longer. Inspection duration depends on property size, access, and Testing factors like sampling scope, suspected contaminants, and lab turnaround, which can extend reporting.
How Much Does an Environmental Inspection Cost?
You’ll pay like a shipwright for a hull survey: inspection cost factors and types of inspections drive fees, so expect roughly $300–$3,000+; you’re buying risk reduction, not paperwork, and specialized sampling can raise costs.
Do I Need to Leave the Property During Testing?
No, you usually don’t need to leave, but you should if testing procedures involve asbestos, mold, or air sampling that could disturb contaminants; inspection duration stays short, yet you’ll reduce exposure risk by vacating nearby areas.
Can I Get a Sample Inspection Report Beforehand?
Yes—you can request a sample report beforehand, since surprise is for birthday parties, not due diligence. You’ll additionally want to review inspection types, scopes, and limitations so you can judge risk, coverage, and methodology accurately.
Are Environmental Inspections Required by Law?
Not always, but you’ll often need one to satisfy environmental regulations and prove legal compliance. You should verify local, state, and federal triggers early, as missing required testing can expose you to fines, delays, and liability.
Conclusion
Knowing when to schedule an environmental inspection helps you avoid costly surprises and project delays. You should arrange testing before you buy, before you renovate, and especially before demolition if the property is older or has a risky history. A qualified inspector can identify hazards early, so you can plan remediation without chaos. Don’t wait until the wrecking crew is at the gate like it’s 1899. Test first, then move forward with confidence.